If you’re ready to get started organizing your pantry but not sure how, this post is for you!
I’m here to help you break it down into a 9 simple steps so that you can notice a difference today!
Everyone is busy but I promise making a bit of time to tackle your pantry will be something that makes a big difference in your daily life. The steps below can be done together at one time or in increments. If you choose to separate them into increments of time, I recommend trying to do them in consecutive days if possible. You don’t want to lose your momentum.
Review all food and throw out any items that are expired. I really do encourage taking everything out of your pantry if you have time. That is the only way to really SEE what you have.
Identify any food that is not expired but that you know you or your family will no longer eat and gather it for donation. This is a great way to give back to those in need.
Identify your categories of food. I’ve included some sample categories below but make sure you identify what works for you.
breakfast ~ snack bars ~ pasta ~ rice ~ bread ~ baking ~ canned soup ~ canned veggies ~ toppings/seasonings ~ overstock ~ kid’s snacks ~ specialty snacks ~ dry storage ~ chips
Begin grouping all of your like foods together. Based on the categories from step #3, move all of the items from each category together.
Pro Tip: don’t get hung up on one or two odd items, focus on the foods that make up a majority of your pantry, we will deal with the odd items at the end.
Once you have everything grouped in place, evaluate or even take photos of how much you have any each category. This is key in picking the right products.
Take measurements and lots of photos before you start shopping for product!
Purchase what ever product you are missing. If you have some existing storage items keep them handy. I usually map out the space by placing all of my empty containers on the empty shelves to make sure I like the loop and style of the layout. I also identify which items are going to be stored in which types of containers while keeping in mind the amounts I have on hand.
If I always have 6+ bags on chips open at any given time, I am going to need a larger bin than if I only have 1-2 flavors open at a time.
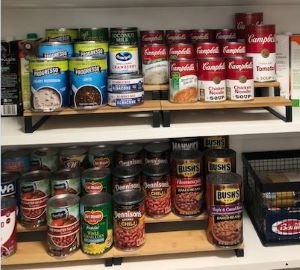
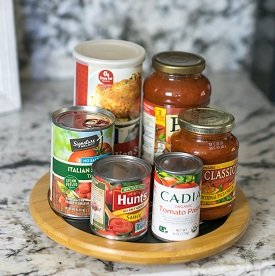
Examples of products I buy for my own pantry!
Pro Tip: don’t skin this step. Bins and baskets do not have to be expensive but without them the work you’ve put in so far will surely undo itself in short time. The containment and compartmentalization is the KEY to staying organized.
Don’t forget to label! It doesn’t have to be fancy but without a label you’re setting yourself up for failure. Harsh, I know, but it’s the truth. Check out my favorite labeling products here. For less than $45 you can have a label maker and multiple tape styles/colors!
Lastly, review your pantry with anyone living in the home. This will help ensure that everyone is on the same page and is dedicated to putting all of your food items where they belong!
Look at that. You did it! Don’t be afraid to make changes when appropriate. It is your space make sure that it works for you!
Deep Shelves?
If you don’t have pull out shelves, using bins is helpful to access the deeper parts of the cabinet.
In the example here, you can pull out the first clear bin to access the one behind making that deep part of the space more accessible.
Clear bins help make sure you can see what you have back there in that deep dark cupboard.
Full Disclosure: Some items linked here are part of the Amazon Affiliate program and I will receive a small commission at no cost to you. Not all items are affiliated, some are just favorites, I’d like to share!


